 Many web developers can trace their humble beginnings to the family room floor of their childhood, where boxes of Lego bricks spilled out into our imaginative hands and became flying cars, futuristic skyscrapers, impenetrable fortresses, and whatever else we could think to build. Yes, many of us enjoy developing web-based applications because it is so much like playing with Lego.
  The database, programming language, and server hardware are our building blocks from which we churn out web sites and online applications.
In this post…
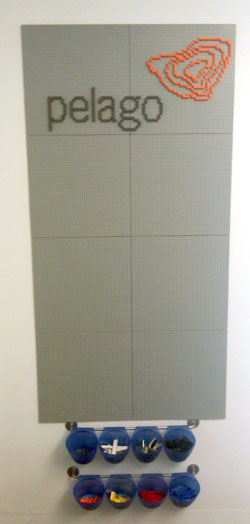
I’m one of those web developers who got his start in Lego and never stopped. When we came up with the idea to build a Lego wall at our office, I immediately hauled in a few buckets worth of Lego and then went to the hardware store for supplies. This wall mounted Lego board how-to will demonstrate how to build your own Lego wall for yourself, your kids, or just a fun event (Lego bricks make a great ice-breaker when left out at parties).
Step 1: Gather up your supplies
You will need the following supplies to get started. Depending on the surface you choose to mount you Lego wall, you may want to substitute the masonite board for a different backing.
- Some wall space
- Stud finder
- Level
- One masonite board cut to size
- Flat-headed wood screws
- Glue strong enough to hold plastic to a smooth wood surface (i.e. Liquid Nails)
- Enough 15″ x 15″ Lego baseplates to tile the masonite surface to create the Lego wall panel
- Legos
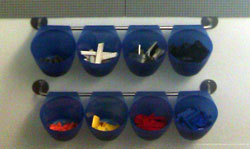
- Wall mountable storage for Lego bricks (We picked ours up at IKEA)
Step 2: Mount the masonite board
Once the masonite board has been cut down to the appropriate size you will need to mount it. We recommend hitting at least a few studs considering the force generated by pulling Lego bricks off of the wall. Mount the masonite board using standard wood screws, and drywall anchors when a stud can’t be found. Use a level while mounting the masonite to make it even with the floor. Make sure to use flat-headed screws and drill them in far enough so the heads are flush with the surface of the masonite (otherwise, the Lego baseplates will have bumps underneath them when mounted.) The masonite board has a tough service so you will really have to drive in the screws to get them flush.
Step 3: Glue on the Lego baseplates
Using a caulking gun or a hand-squeezable tube, dab the glue onto the backs of the Lego baseplates. Good coverage is important to make sure sections of the baseplate won’t lift up. Press the baseplate onto the wall and use tape to secure it in place. This will stop the plate from sliding down while the glue dries. After the first baseplate has been mounted, use lego bricks to mount the second plate. By spanning the two baseplates using Lego bricks, you will ensure that the plates are properly spaced so Lego pieces will fit across them. This will result in a gap of approximately 1mm, which is somewhat conspicuous, but gaurantess the baseplates are properly spaced. Tape the additional baseplates in place as well to make sure the added weight does not pull the baseplates down.
Step 4: Lego brick storage
 Now decide where you want to store the Lego bricks. We chose to store them in buckets mounted below the Lego wall. We used some standard storage items we found at IKEA. You may want to just throw you Lego bricks into a box at the base of the Lego wall. Whatever you decide is up to you.
Step 5: Build something!
That’s it. The Lego wall is complete. Build anything you want. We decided to build a pixel version of our logo (which I’ll walk about in another blog post). Next up we’re planning on doing some of our favorite video game characters. The best part is that anyone can build anything they want, and the wall mounted Lego board makes for a nice break away from all the time we spend coding web sites.
Lego minifig photo credit: brad montgomery


My Lego baseplate is peeling off of the actual board. Can I continue to peel it off and glue it onto the wall?Thank you.
Sincerely,
Tara
Tara, I would advise regluing it to the actual board. If it’s glued directly to the wall it will most likely peel off the paint when it comes time to remove it. By reattaching it to the board you can peel the plates from the board and then remove the screws.